Creating a Romantic Wedding Pavilion Shadow Box Paper Cut
There is something undeniably magical about the way light filters through layered paper, casting intricate shadows that tell a story without saying a word. For crafters and DIY enthusiasts looking to capture the essence of romance and celebration, the Wedding Pavilion Shadow Box Paper Cut offers a stunning medium to do just that. This isn’t merely a craft project; it is a tangible piece of art that encapsulates the elegance of a wedding day, preserved in layers of cardstock and light. Whether you are a seasoned paper artist or someone picking up a craft knife for the first time, understanding how to utilize this template can transform a simple square of paper into a breathtaking three-dimensional display.
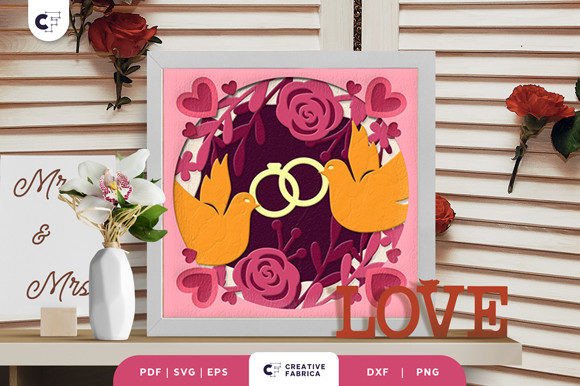
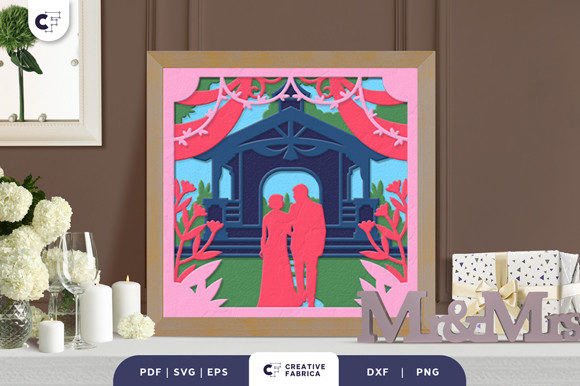
The concept behind a shadow box is deceptively simple yet technically rewarding. It relies on depth. By stacking multiple layers of cut paper, each slightly different in design, you create a scene that draws the eye inward. The Wedding Pavilion design specifically leverages this depth to mimic the architectural beauty of a gazebo or pavilion, often associated with outdoor ceremonies and intimate vows. When assembled, the six distinct layers work in harmony to produce a sense of perspective that flat artwork simply cannot achieve. It is a celebration of geometry, patience, and love, all rolled into a compact 20.32 by 20.32 cm frame.
Beyond the Craft Table: Real-World Applications
While the immediate impulse might be to keep this creation for your own home decor, the versatility of the Wedding Pavilion Shadow Box Paper Cut extends far beyond personal hobbyism. Consider the modern wedding industry, where personalized touches are increasingly valued over generic decorations. This template serves as an excellent foundation for custom wedding favors or centerpiece accents. Imagine placing a small, illuminated version of this shadow box on each reception table. As the evening progresses and the ambient lighting dims, the internal glow from LED strips would highlight the delicate arches and floral motifs, creating a warm, inviting atmosphere for guests.
For professional event planners and decorators, having access to high-quality digital templates like this SVG file allows for rapid prototyping and customization. You aren't limited to the default size. Because the SVG file maintains its aspect ratio when resized, you can scale the design up for a large backdrop installation or down for delicate cake toppers. This flexibility means the same design asset can serve multiple purposes within a single event, ensuring visual cohesion from the invitation suite to the reception hall.
Furthermore, this project holds significant value for those in the greeting card and stationery industry. A handmade card featuring a miniaturized version of this pavilion design stands out in a market saturated with mass-produced options. It signals effort, thoughtfulness, and artistic flair. For small business owners selling on platforms like Etsy or at local craft fairs, offering these as bespoke anniversary gifts or engagement presents can tap into a niche market of buyers seeking meaningful, handcrafted alternatives to traditional jewelry or flowers.
Choosing the Right Materials for Depth and Durability
The success of any shadow box project hinges largely on material selection. While the digital template provides the roadmap, the paper you choose determines the final aesthetic and structural integrity. The recommended Encore Cardstock 80 lb cover (216 gsm) is not an arbitrary suggestion. This weight strikes a crucial balance. It is thick enough to hold its shape without warping under the tension of assembly, yet thin enough to allow for clean, precise cuts without requiring excessive force that might tear delicate details.
If you opt for lighter paper, you risk the layers sagging or losing their defined edges, which blurs the shadow effect. Conversely, paper that is too thick may be difficult to layer effectively, making the box bulky and hard to frame. The opacity of the cardstock also plays a role. For a traditional shadow box, solid colors provide strong contrast between the cutouts and the background. However, if you plan to convert this into a light box, consider using translucent vellum or semi-transparent paper for specific inner layers. This allows light to diffuse softly, creating a ethereal glow rather than harsh silhouettes.
Color theory is another practical consideration. The classic white-on-white look is elegant and timeless, relying entirely on shadow for definition. However, don’t shy away from experimentation. Using soft pastels like blush pink, sage green, or ivory can add a subtle warmth that complements the wedding theme. For a more dramatic effect, deep navy or charcoal layers paired with a bright backlight can create a striking silhouette that feels modern and sophisticated. The key is consistency; ensure that the color palette aligns with the intended setting where the piece will be displayed.
The Assembly Experience: Precision Meets Patience
Assembling a six-layer shadow box is a meditative process. It requires attention to detail, but the results are immensely satisfying. Before you begin cutting, it is wise to organize your workspace. If you are using a cutting machine like a Silhouette or Cricut, ensure your blade is sharp. Dull blades drag the paper, resulting in frayed edges that ruin the crispness of the design. For those without cutting machines, using a high-quality art knife and a self-healing cutting mat is essential. Take your time with the intricate curves of the pavilion arches; rushing here leads to mistakes that are difficult to correct later.
Once all six layers are cut, the assembly begins. Using glue or double-sided tape, you will stack the layers in sequential order. Double-sided foam tape is often preferred over liquid glue because it adds a consistent spacing between layers, enhancing the 3D effect without the mess of wet adhesive. Start from the back layer and work your way forward, checking alignment frequently. It is helpful to use a lightbox or a window during assembly to ensure that each layer sits perfectly centered over the previous one. Misalignment at the bottom layers compounds as you go up, potentially skewing the entire perspective.
This stage is also where you decide on the final format. Will it be a framed wall decoration or a glowing light box? If you choose the latter, now is the time to integrate your LED strips. Battery-operated fairy lights or flexible LED strips can be tucked between the middle layers. Be mindful of wire placement; you want the light source to be hidden while ensuring the wires don’t bulge and distort the paper layers. Testing the lighting before sealing the final frame is crucial to avoid having to dismantle your hard work.
Navigating Limitations and Expectations
While the Wedding Pavilion Shadow Box Paper Cut is a versatile and beautiful project, it is important to approach it with realistic expectations. One common limitation is the fragility of paper art. Unlike wood or metal crafts, paper is susceptible to humidity and direct sunlight. Over time, exposure to UV rays can cause fading, especially with colored cardstocks. Therefore, these pieces are best suited for indoor display, away from direct windows. If you intend to gift this item, consider advising the recipient on proper care, such as keeping it in a dry environment and using UV-protective glass if framing it.
Another consideration is the complexity of the design. With six layers, there is a moderate learning curve. Beginners might find the smaller, intricate details challenging to weed or cut cleanly. It is advisable to practice on scrap paper first to get a feel for the machine settings or knife pressure. Additionally, while the SVG format is highly compatible with most cutting software, users should verify their machine’s capabilities regarding minimum cut sizes. Some older machines may struggle with the finest details of the pavilion’s lattice work, requiring slight simplifications or manual touch-ups.
Despite these minor hurdles, the reward far outweighs the effort. The act of creating something so delicate and meaningful fosters a connection to the craft that is rare in our digital age. Whether you are making it for a friend’s wedding, decorating your own home, or expanding your product line, the Wedding Pavilion Shadow Box offers a blend of technical challenge and artistic fulfillment. It stands as a testament to the beauty of layering, both in paper and in life, reminding us that depth and perspective are what truly bring a scene to life.
For those ready to embark on this creative journey, having the right files is the first step. The inclusion of SVG, PDF, EPS, PNG, and DXF formats ensures that regardless of your preferred tool—be it a high-tech cutter or a simple pair of scissors—you have the resources needed to succeed. The ability to resize while maintaining aspect ratio gives you the freedom to adapt the project to your specific needs, making it a truly customizable experience. As you gather your materials and prepare your workspace, remember that imperfections are part of the handmade charm. Each slight variation adds character, making your Wedding Pavilion Shadow Box Paper Cut uniquely yours.